


Your Guide to Excavator Mowers
Posted by Mackenzi Griffin on 21st May 2024
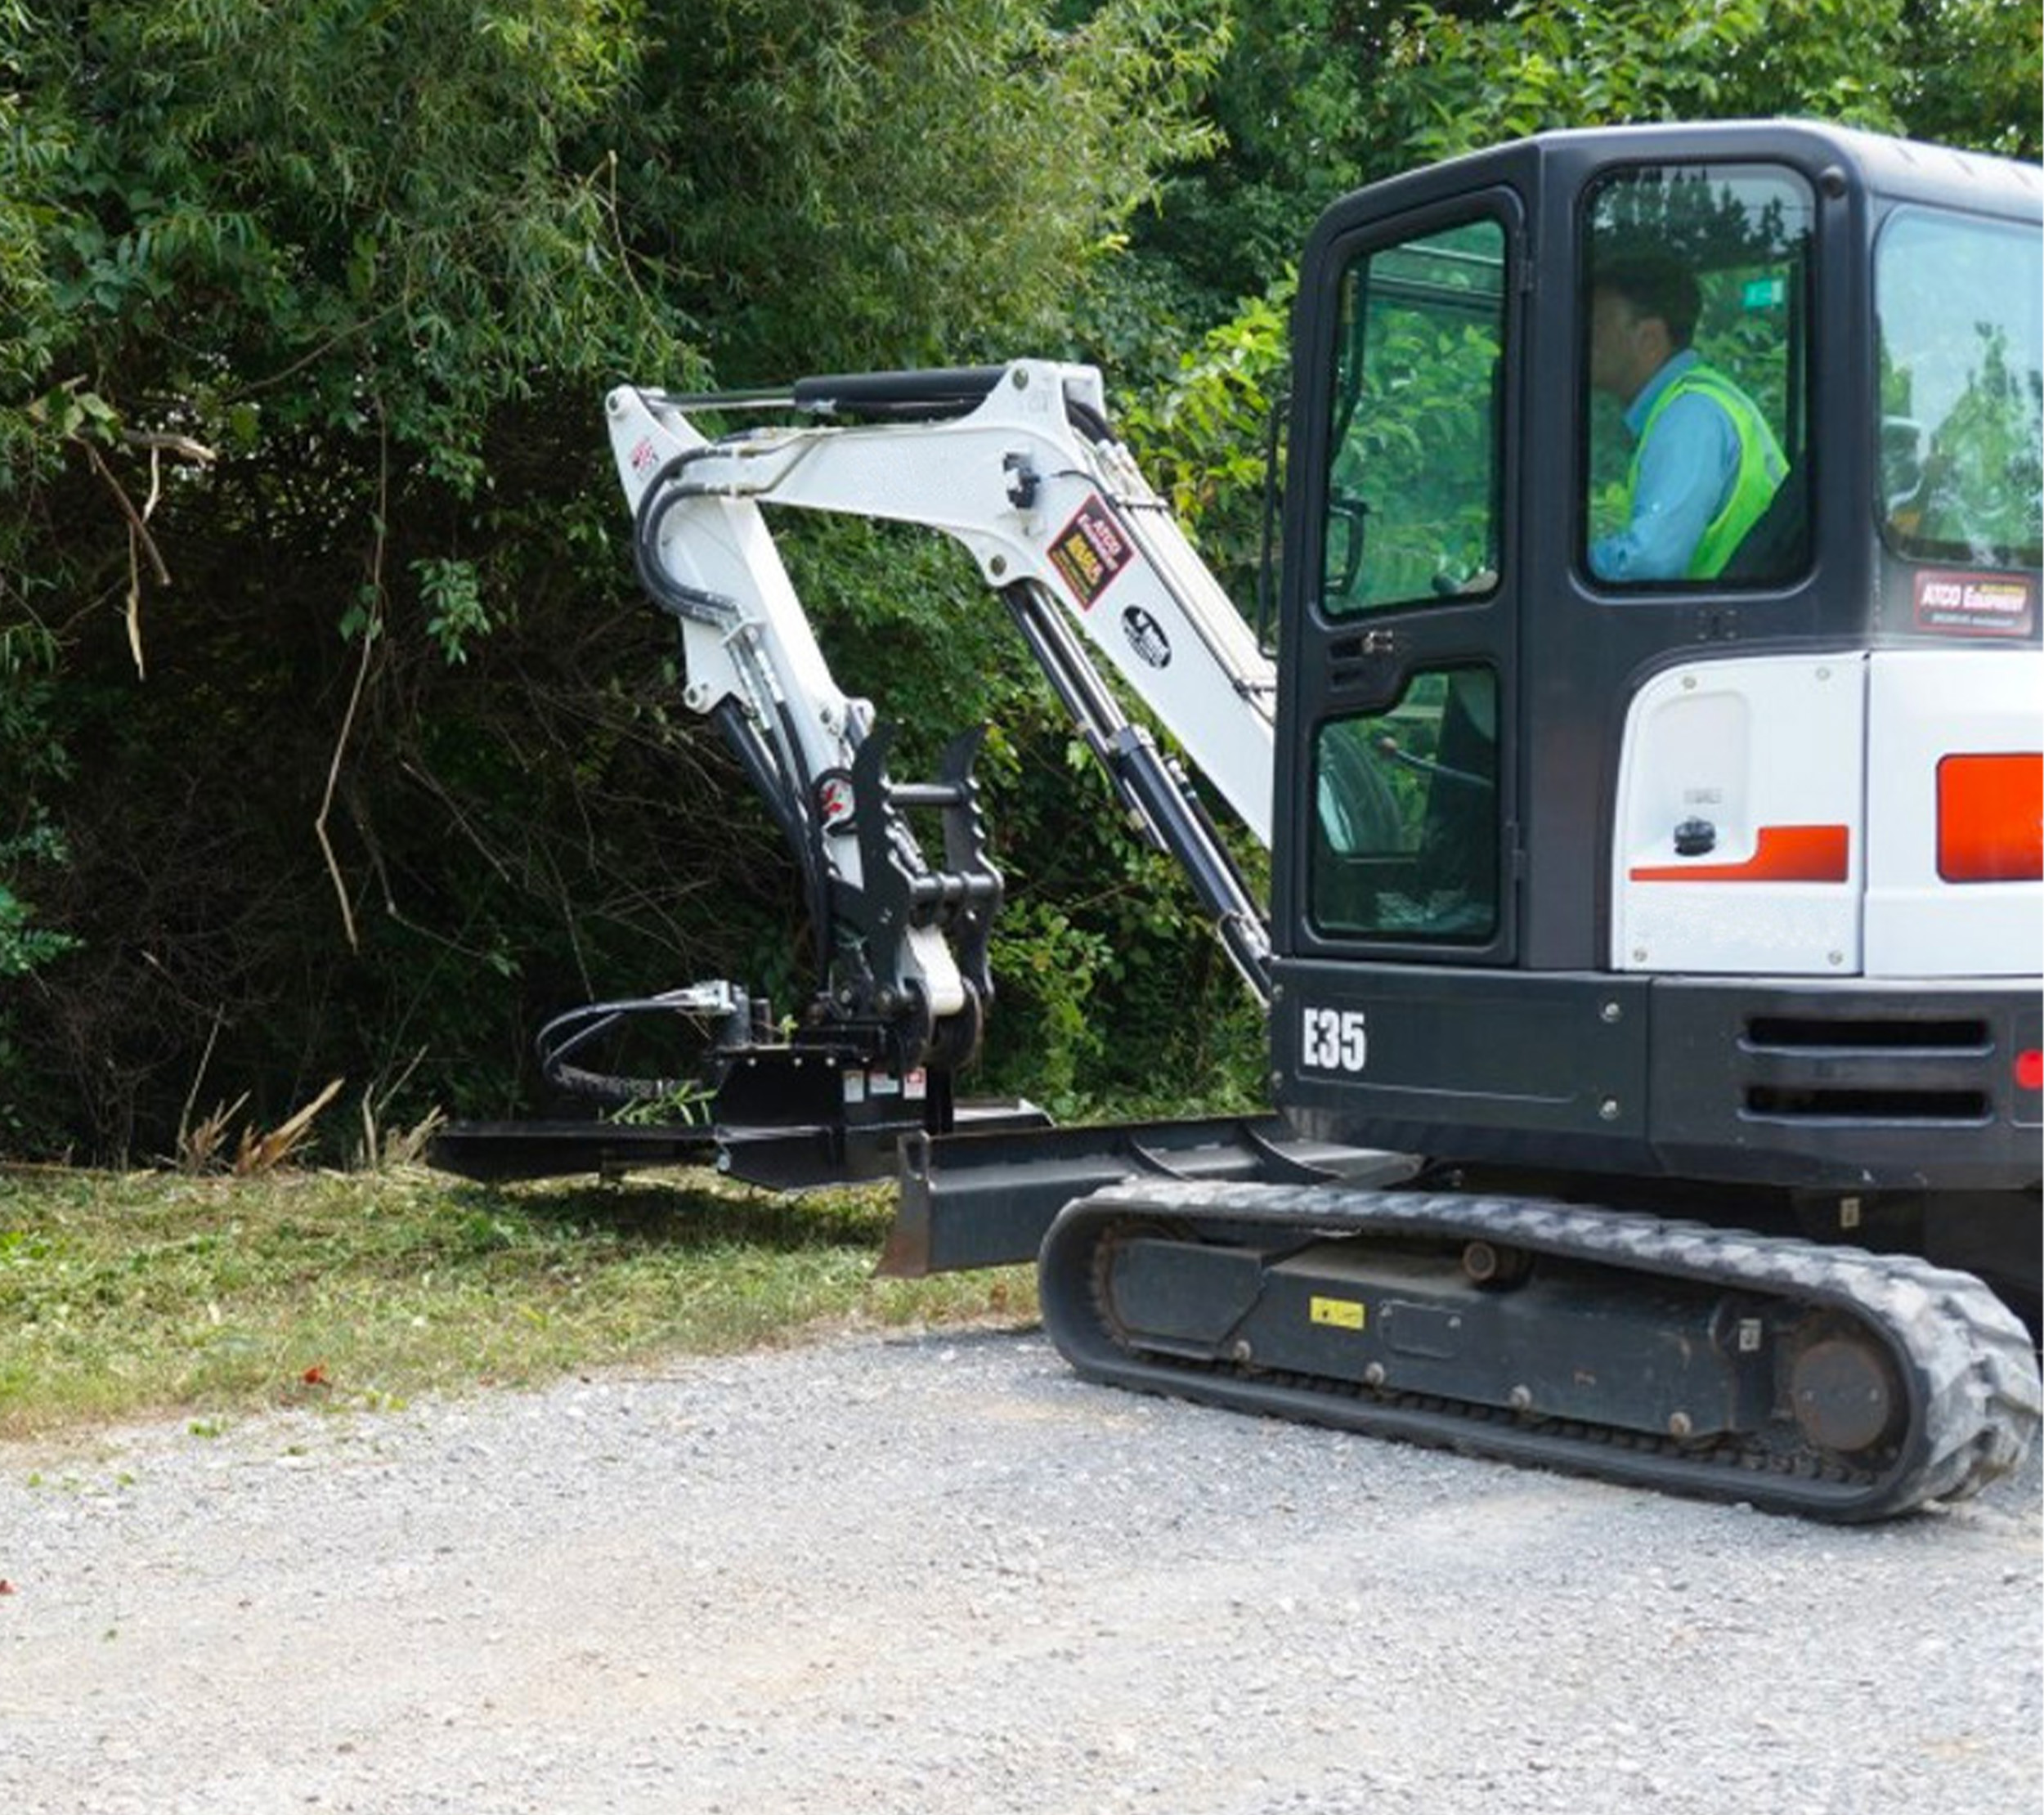
The precision and control of an excavator boom arm gives you an unreal advantage over any project. When you slap a mower on one, you can do just about anything you need to between prepping construction sites, farming, and large-scale land management.
We will look at the powerful and efficient engineering behind different models of excavator mower attachments and how their design gets the job done.
Flail Mowers

Flail mowers are great for dealing with thick brush and small trees. They're designed to mulch as they cut, which helps in areas where you want to maintain a clean-looking finish. They handle debris well and reduce the risk of projectiles, which makes them a little safer around people. Their precise cutting is best for maintaining parks, roadside verges, and other public landscapes where aesthetics is important.
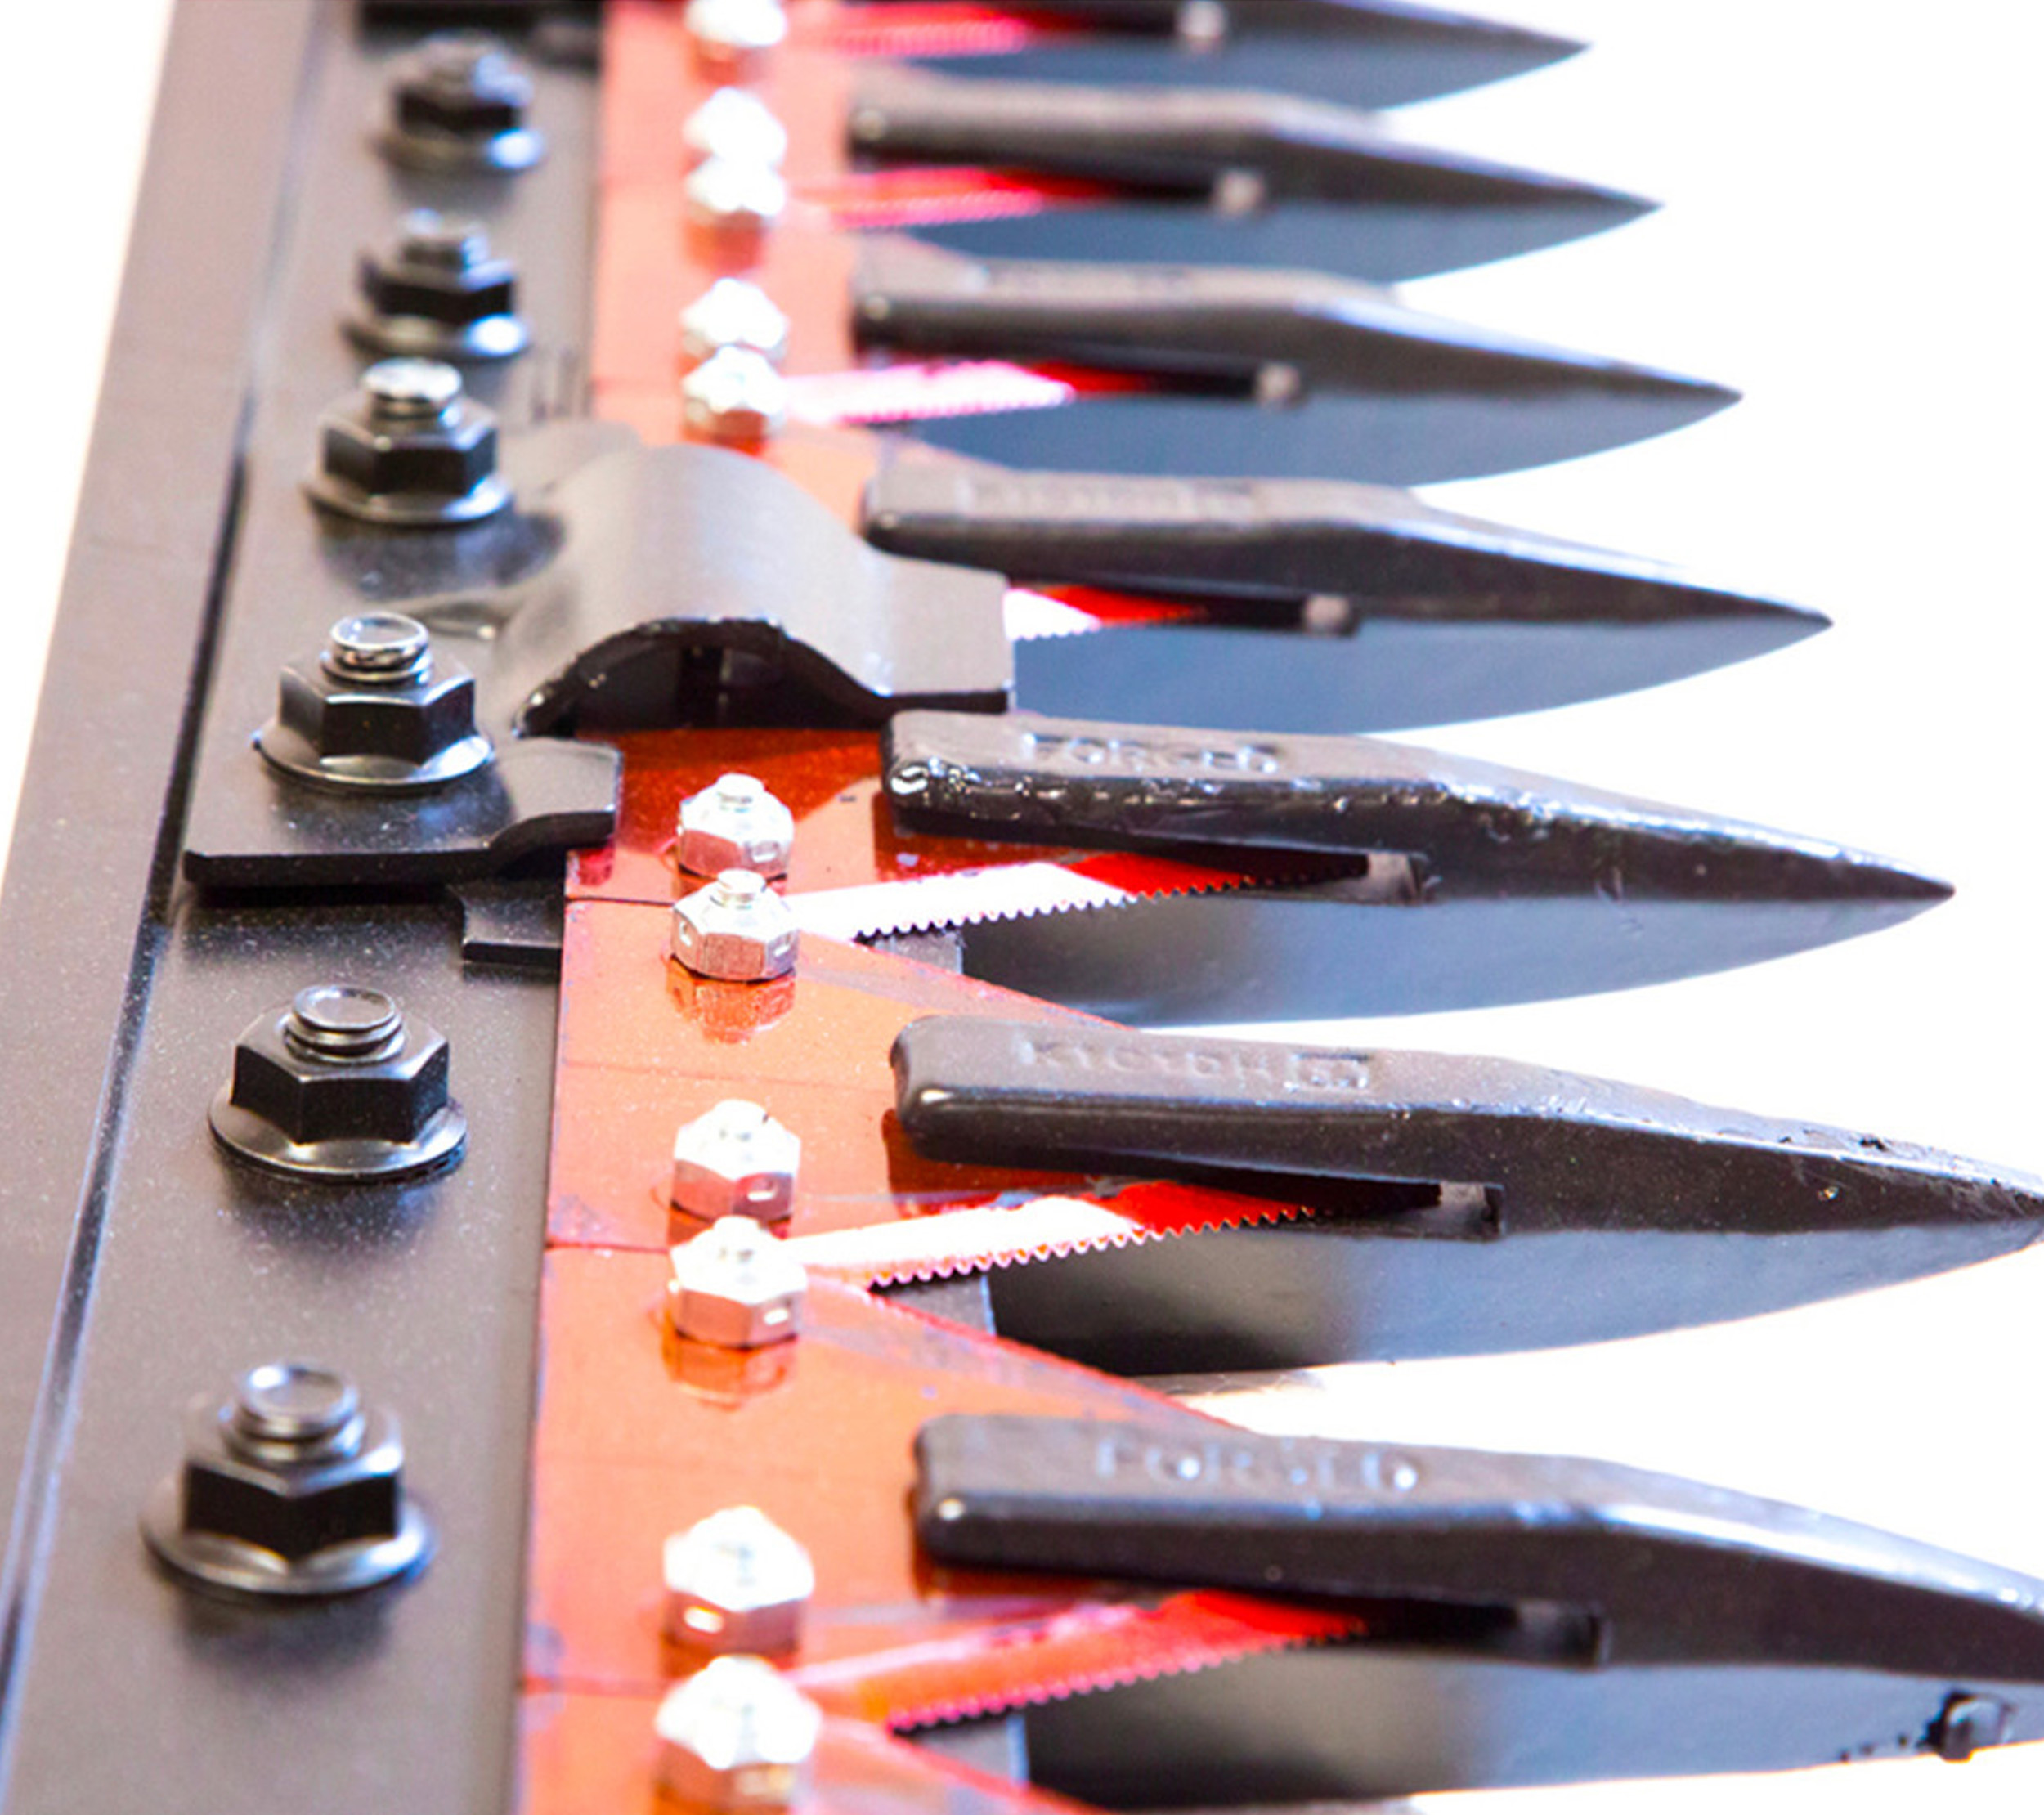
The blades are critical to the functionality and efficiency of a flail mower, designed for all terrains and vegetation types. Their unique shape and durable build make them the right choice for heavy-duty mowing tasks. Regular maintenance and timely replacement of these blades are key to keeping the mower in top working condition.
Flail mower blades are typically small and Y-shaped, resembling a "T" or "Y" depending on the specific design. This allows the blades to swing freely, attached to a rotating drum or shaft, so that they can shift slightly when they hit hard obstacles. This flexibility protects the mower from damage when striking rocks or debris. The swinging of the blades also gives you a bigger cutting surface across the width of the mower. Because the blades can swing back toward the drum when they hit things, they are also less likely to project objects at high speeds, which keeps people and property safe.
The steel that the blades are fabricated from is based on durability and strength, most flail mower blades are made from high-carbon steel, for wear resistance and edge retention.
Some higher-end flail mowers use blades made from heat-treated boron steel which are especially effective in rougher conditions and last longer than standard high-carbon steel blades. Some blades feature a protective coating that reduces wear and corrosion, which is crucial if the blades are frequently exposed to moisture.
Flail mower blades are typically mounted on chains or directly to the drum via bolts. The mounting method can affect the swing radius and the cutting action of the blade. The weight of each blade is carefully calibrated so that the mower stays balanced during operation for efficient, vibration-free operation.
Many flail mowers are designed for easy blade replacement. This feature helps with maintaining performance and extending the lifespan of the mower, since worn or damaged blades can be quickly swapped out.
Rotary Cutters
Rotary Mowers are hefty attachments built for serious land management jobs. Whether it’s slicing through thick grass, clearing out brush, or taking down small trees, this mower is up for it. Rotary Cutters feature one or more, round blades that sit horizontally on a shaft, spinning into action with the power of the excavator's hydraulic system.
These attachments use one or more large, round blades. They're effective for cutting through dense vegetation and even small trees. Rotary cutters are more about power than the fine finish you’d get with a flail mower. They're good for clearing large, overgrown fields and are less likely to get tangled in dense brush.
The blades are the muscle behind the mower. The thickness and strength of the blades allow them to slice through dense brush and take down small to medium-sized trees. Let’s talk about what these blades are made of and why it matters.
A lot of the blades you’ll find are made from high-carbon steel. This stuff is tough and wears well, which means it can chew through thick brush and keep on going without missing a beat.
Then you’ve got your boron steel blades. These are a step up in terms of hardness and durability. They’re often heat-treated to boost their strength and resistance to wear, making them a solid choice for hacking through tougher vegetation and even some softer rocks.
Some blades take it even further with carbide tips. Carbide is incredibly solid and stands up to a lot of wear and tear, which makes these blades perfect for jobs involving hard, woody plants and trees, or when you just need to get more hours out of them.
Similar to carbide tips but even tougher, tungsten carbide is for those really demanding jobs. It’s about as hardcore as it gets in terms of impact resistance and longevity.
Last but not least, alloy steels are mixed with different elements to boost certain qualities like strength, hardness, and wear resistance. These blades are built to endure stress, making them ideal for heavy-duty cutting jobs where you might be running into some really hard material.
Choosing the right blade fabrication is key to getting the performance and durability you need out there. Each type has its own strengths, so picking the right one can mean the difference between a job well done and a job that needs redoing.
Rotary Cutters typically feature a safety guard with the main function of containing and deflecting debris thrown upward or outward during mowing. This debris can include rocks, wood, metal fragments, and other materials that might be hidden within the vegetation. By containing this debris, the guard significantly reduces the risk of injury or damage to nearby people, vehicles, or structures. Safety guards are typically made from heavy-duty steel to take the heavy impact of high-speed debris.
The design of the guard usually covers the sides and sometimes the top of the cutting area. The extent of coverage is important to ensure that debris is effectively contained. Some guards might also include front flaps or rubber skirts to manage the discharge and minimize the dust and debris that escape.
Despite their heavy-duty construction, most safety guards are designed to allow easy access to the mower for maintenance. This might be hinged or removable sections that provide access to the mower blades for cleaning, sharpening, or replacement.
Most rotary mowers offer adjustable cutting heights, which allows operators to set the blade height according to job requirements. Assessing and adjusting the cutter height will give you better performance and protect your cutter and the landscape from damage.
Many rotary mowers come with a direct drive system for the cutting head, which offers more durability and requires less maintenance than belt-driven systems.
Sickle Bar Mowers
An excavator sickle bar mower, or as some folks like to call it, a vertical shaft mower or sickle hedge cutter, is what you need for mowing or trimming grass and shrubs, especially in those tough-to-reach spots where your regular mowing gear just can’t cut it.
The sickle bar mower uses a reciprocating motion that cuts kind of like scissors. This cutting method gives you that even, clean look. The teeth interlock or overlap slightly with each other for continuous cutting action as the bar moves, allowing for a clean cut without gaps as the mower passes over vegetation. These clean cuts are important for plant health, particularly in wet conditions where torn or jagged cuts increase the risk of disease.
The blades on a sickle bar mower are typically smooth and don’t have as wide of a surfaces as rotary mower blades do. This helps reduce the amount of wet plant matter that sticks to the blades, to keep clumping and clogging to a minimum.
The teeth on a sickle bar mower are arranged along a long, narrow bar commonly, made from high-carbon steel, which is a good balance between strength and the ability to hold a sharp edge. Often, the teeth undergo a heat-treating process to increase their hardness and wear resistance. This treatment gives the teeth a coating that gives them their water resistance.
Even though sickle mowers are perfect for wet conditions, always be careful on steep, muddy slopes to not slip or slide. Regular cleaning and maintenance of the blades are also more crucial after cutting in wet conditions to prevent rust and ensure the longevity of the mower.
How Do I Attach This Thing?
Attaching a mower to your excavator involves several steps, ensuring a secure and efficient setup. Here’s a straightforward guide to help you get it done properly:
1. Preparation:
Check Compatibility: Ensure that the flail mower attachment is compatible with your excavator in terms of hydraulic flow requirements, weight, and size.
Inspect Both: Before attaching, inspect the flail mower and the excavator for any damage or wear that could affect operation. Make sure all hydraulic lines and fittings are in good condition.
2. Positioning the Excavator:
Stabilize the Excavator: Park your excavator on a flat, stable surface. Lower the stabilizers or tracks to secure the excavator and prevent any movement during the attachment process.
3. Connecting the Flail Mower:
Align the Attachment: Use the excavator’s arm to carefully align the attachment plate of the flail mower with the coupling mechanism of the excavator.
Engage the Coupler: Depending on your excavator’s setup, this might be a manual process involving pins or a hydraulic coupler that you engage from the cab. Make sure the attachment is securely locked in place.
Safety Check: Double-check the attachment point for any movement or looseness that could indicate improper coupling.
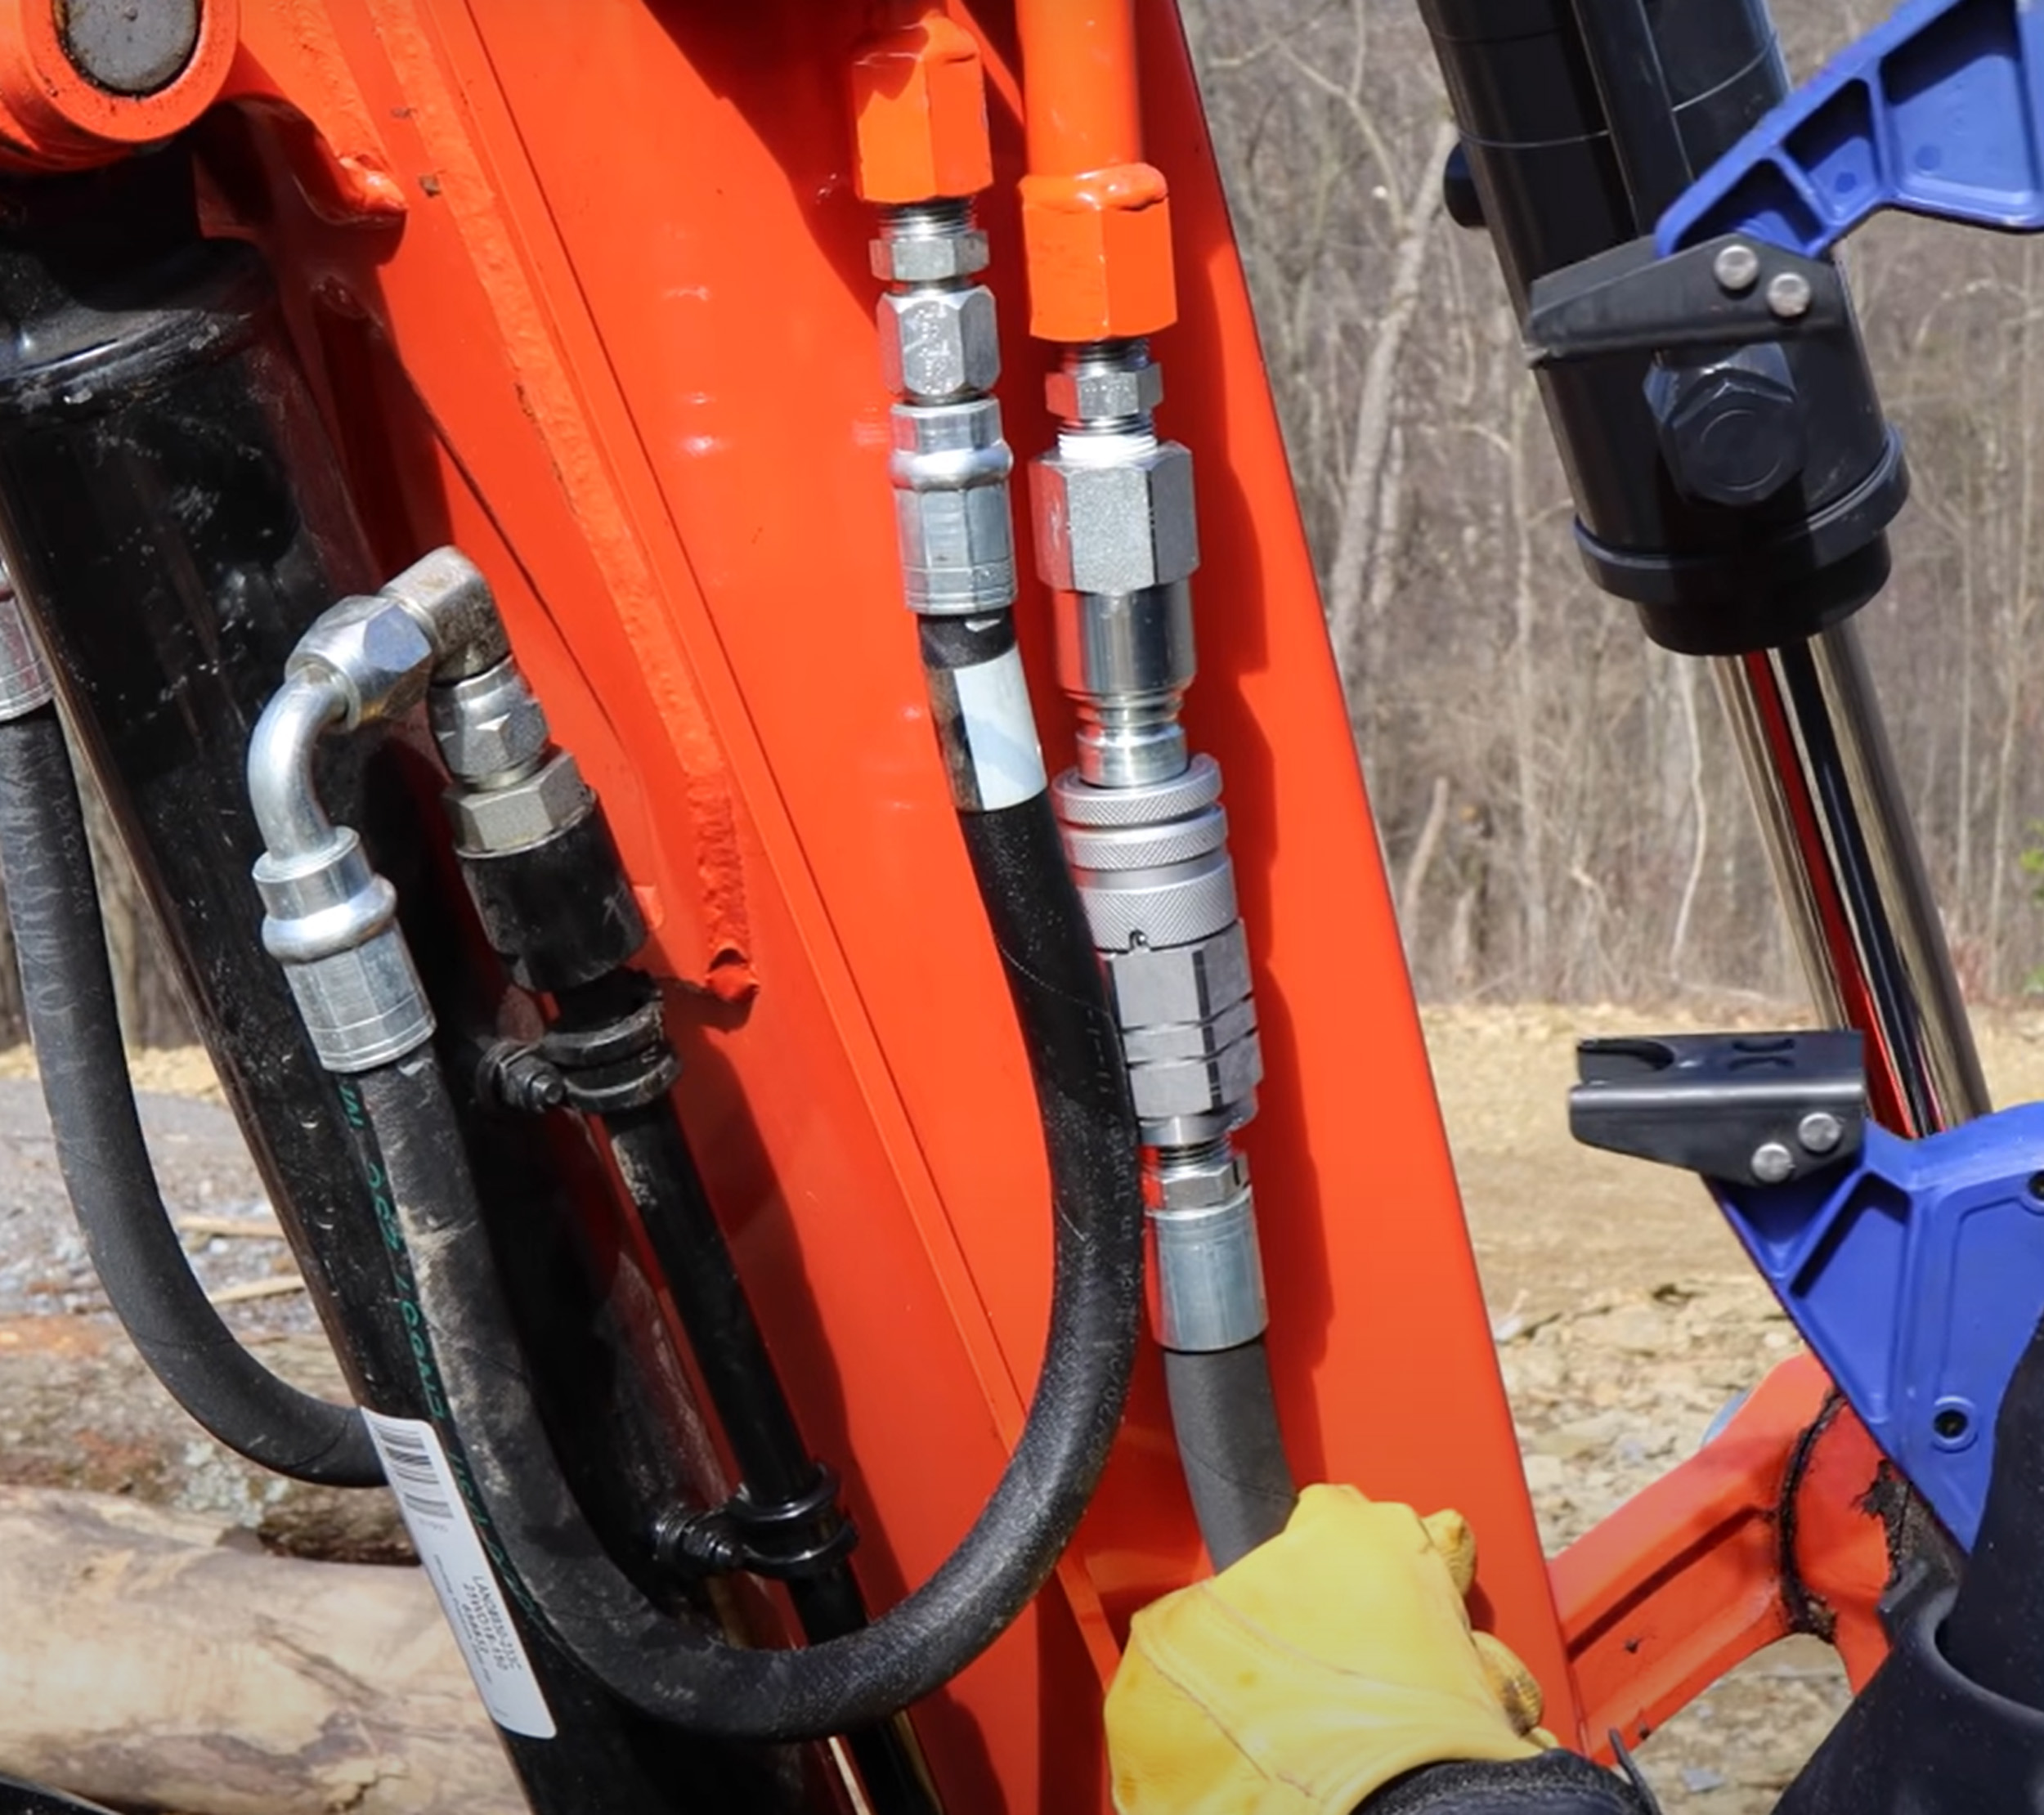
4. Connecting Hydraulic Lines:
Identify the Hydraulic Hoses: Locate the hydraulic supply and return lines on the flail mower.
Connect Hydraulic Hoses: Attach the hydraulic hoses from the flail mower to the corresponding ports on the excavator. Ensure these connections are tight and secure to prevent leaks.
Secure Hose Routing: Make sure the hydraulic hoses are well routed to avoid pinch points or excessive wear during operation.
5. Functional Test:
Start the Excavator: With the flail mower securely attached, start the excavator and operate the flail mower at a low speed to ensure everything is working correctly.
Check for Leaks: While the mower is running, check for hydraulic leaks or any unusual noises that might indicate a problem.
Test Controls: Verify that the controls respond correctly and the flail mower operates smoothly.
6. Safety and Operational Checks:
Inspect Safety Features: Ensure that all safety guards and features on the flail mower are intact and functional.
Review Operating Procedures: Familiarize yourself with the operating limits of the flail mower, such as maximum and minimum operating heights and any manufacturer-specific recommendations.
How Do I Work This Thing?
Operating a flail mower attachment on your excavator efficiently and safely involves understanding several key procedures. Here’s a detailed step-by-step guide to get you started:
1. Preparation:
Review the Manual: Always start by reading the operator's manual for both your excavator and the flail mower attachment. This will give you specific instructions and safety guidelines.
Inspect the Equipment: Check the flail mower for any loose bolts, worn parts, or hydraulic leaks. Ensure the attachment is securely fastened and the hydraulic lines are properly connected without kinks or damage.
2. Setting Up the Excavator:
Position the Excavator: Place the excavator on level ground. If your site isn't level, make sure the excavator is stable and unlikely to shift during operation.
Engage Safety Features: Lower any stabilizers or blades your excavator has. This will help to anchor it while you operate the flail mower.
3. Starting Operation:
Fire up your excavator, letting the engine warm up as recommended in the manufacturer’s guidelines.
Engage the hydraulic system that powers the flail mower. Start at a lower speed to ensure everything is running smoothly without any unusual vibrations or noises.
4. Mowing Operation:
Use the excavator controls to adjust the height of the flail mower. It’s important to set the cutting height according to the type of vegetation and the terrain. Avoid setting it too low as it can cause damage to both the mower and the surface.
Operate the mower at a speed that allows it to cut effectively without bogging down. The thickness of the vegetation will dictate how fast you can go. Thicker brush will require a slower pace to allow the mower to cut effectively and prevent clogging.
Keep an eye on hydraulic pressure; if the mower is working too hard, the system pressure will rise, which can be risky. Adjust your operating technique accordingly.
For the best results, make multiple passes over heavily overgrown areas. Always move forward with the cut, and use the excavator arm to guide the mower steadily.
5. Safety and Monitoring:
Always be aware of your surroundings to avoid swinging the mower into obstacles, vehicles, or people.
Periodically stop working to check for debris buildup around the mower’s drum and to inspect for hydraulic leaks or loose connections.
6. Post-Operation:
After completing your mowing, clean the flail mower thoroughly to remove any debris and vegetation.
Look for signs of wear or damage, particularly on the flails and attachment points. Ensure the flail mower is stored in a clean, dry place to prevent rust and deterioration.
Each style has its own specific applications and optimal settings for use, making them highly versatile for different scenarios in construction, landscaping, or agricultural projects. Depending on your specific needs—whether it’s the level of finish, the type of vegetation, or the terrain—we have an excavator cutter to fit the job perfectly. Still have questions? Give us a call at866.966.2538, we’ll get you sorted out.