


How to Install Fence Posts with a Post Driver
Posted by Maranda Wilson and Kyle Davis on 30th Jan 2017
The concept of installing fences or posts seems relatively simple – stick posts in the ground deep enough so they stand on their own. Turns out this is easier said than done, as there are a number of methods to accomplish this. Granted, some are better than others, and there are a variety of factors to consider such as time, cost, and labor required. At Skid Steer Solutions, we're all about efficiency, and making your machine work for you, so we're partial to Post Driver Attachments. Our Post Drivers are often utilized by professional fence contractors who are looking to increase productivity, complete more jobs, and make more money, but there's no reason why farm and ranch owners with large acreage wouldn't benefit from these powerful tools. Really, any skid steer operator looking to install a high volume of fencing can benefit from a Skid Steer Post Driver. As we dive into various methods, we'll outline some common and more manual options, as well as explore the various attachment and skid steer solutions available to our customers.

Method 1: By hand (directly into soil)
This is the old-school, back-in-my-day method. It works, and always has, but it's not for the faint of hear. Dig a hole by hand (or even better, use a Skid Steer Auger Attachment - sorry, we know this is the "by hand" section, but we just can't help ourselves) and tamp the hand-set post. For dense soil, posts can be directly installed (only if the soil is really dense and has good drainage). The hole should ideally be about 1/3 of the total length of the post. The diameter should hug the fence post size.
Pros: Requires no heavy machinery and little equipment; inexpensive; and more likely to be decay resistant.
Cons: Time consuming; labor intensive; and less stable.
Method 2. By hand (set into gravel)
Consider using gravel if the soil has poor drainage. Follow the same procedure as setting a post directly in soil by hand, except the size of the hole must be made larger to accommodate the gravel. For a standard 4x4 post, dig roughly 8 inches across. Tamp down pea-sized gravel or crushed rock into the hole. Continue to tamp every 4 inches. Steady the post into the hole and continue to fill with gravel and tamp on the surface around the post.
Method 3. Post hole digger and set in concrete
Alternatively, fill the hole with concrete if you are working with soft or sandy soil. Be aware that concrete increases the risk of trapping moisture in the post and subsequently the risk of premature rotting. Because the posts in concrete require a surrounding gap of 12 inches, a post hole digger or clamshell digger is recommended. This allows for more uniform sized holes – holes that should be consistent throughout and not cone shaped. Fill then tamp the hole with a base a gravel or crushed stone. Use stakes to keep the post in place during the pouring process and scrape the concrete up against the post in a cone shape.
Method 4. Manual post driver
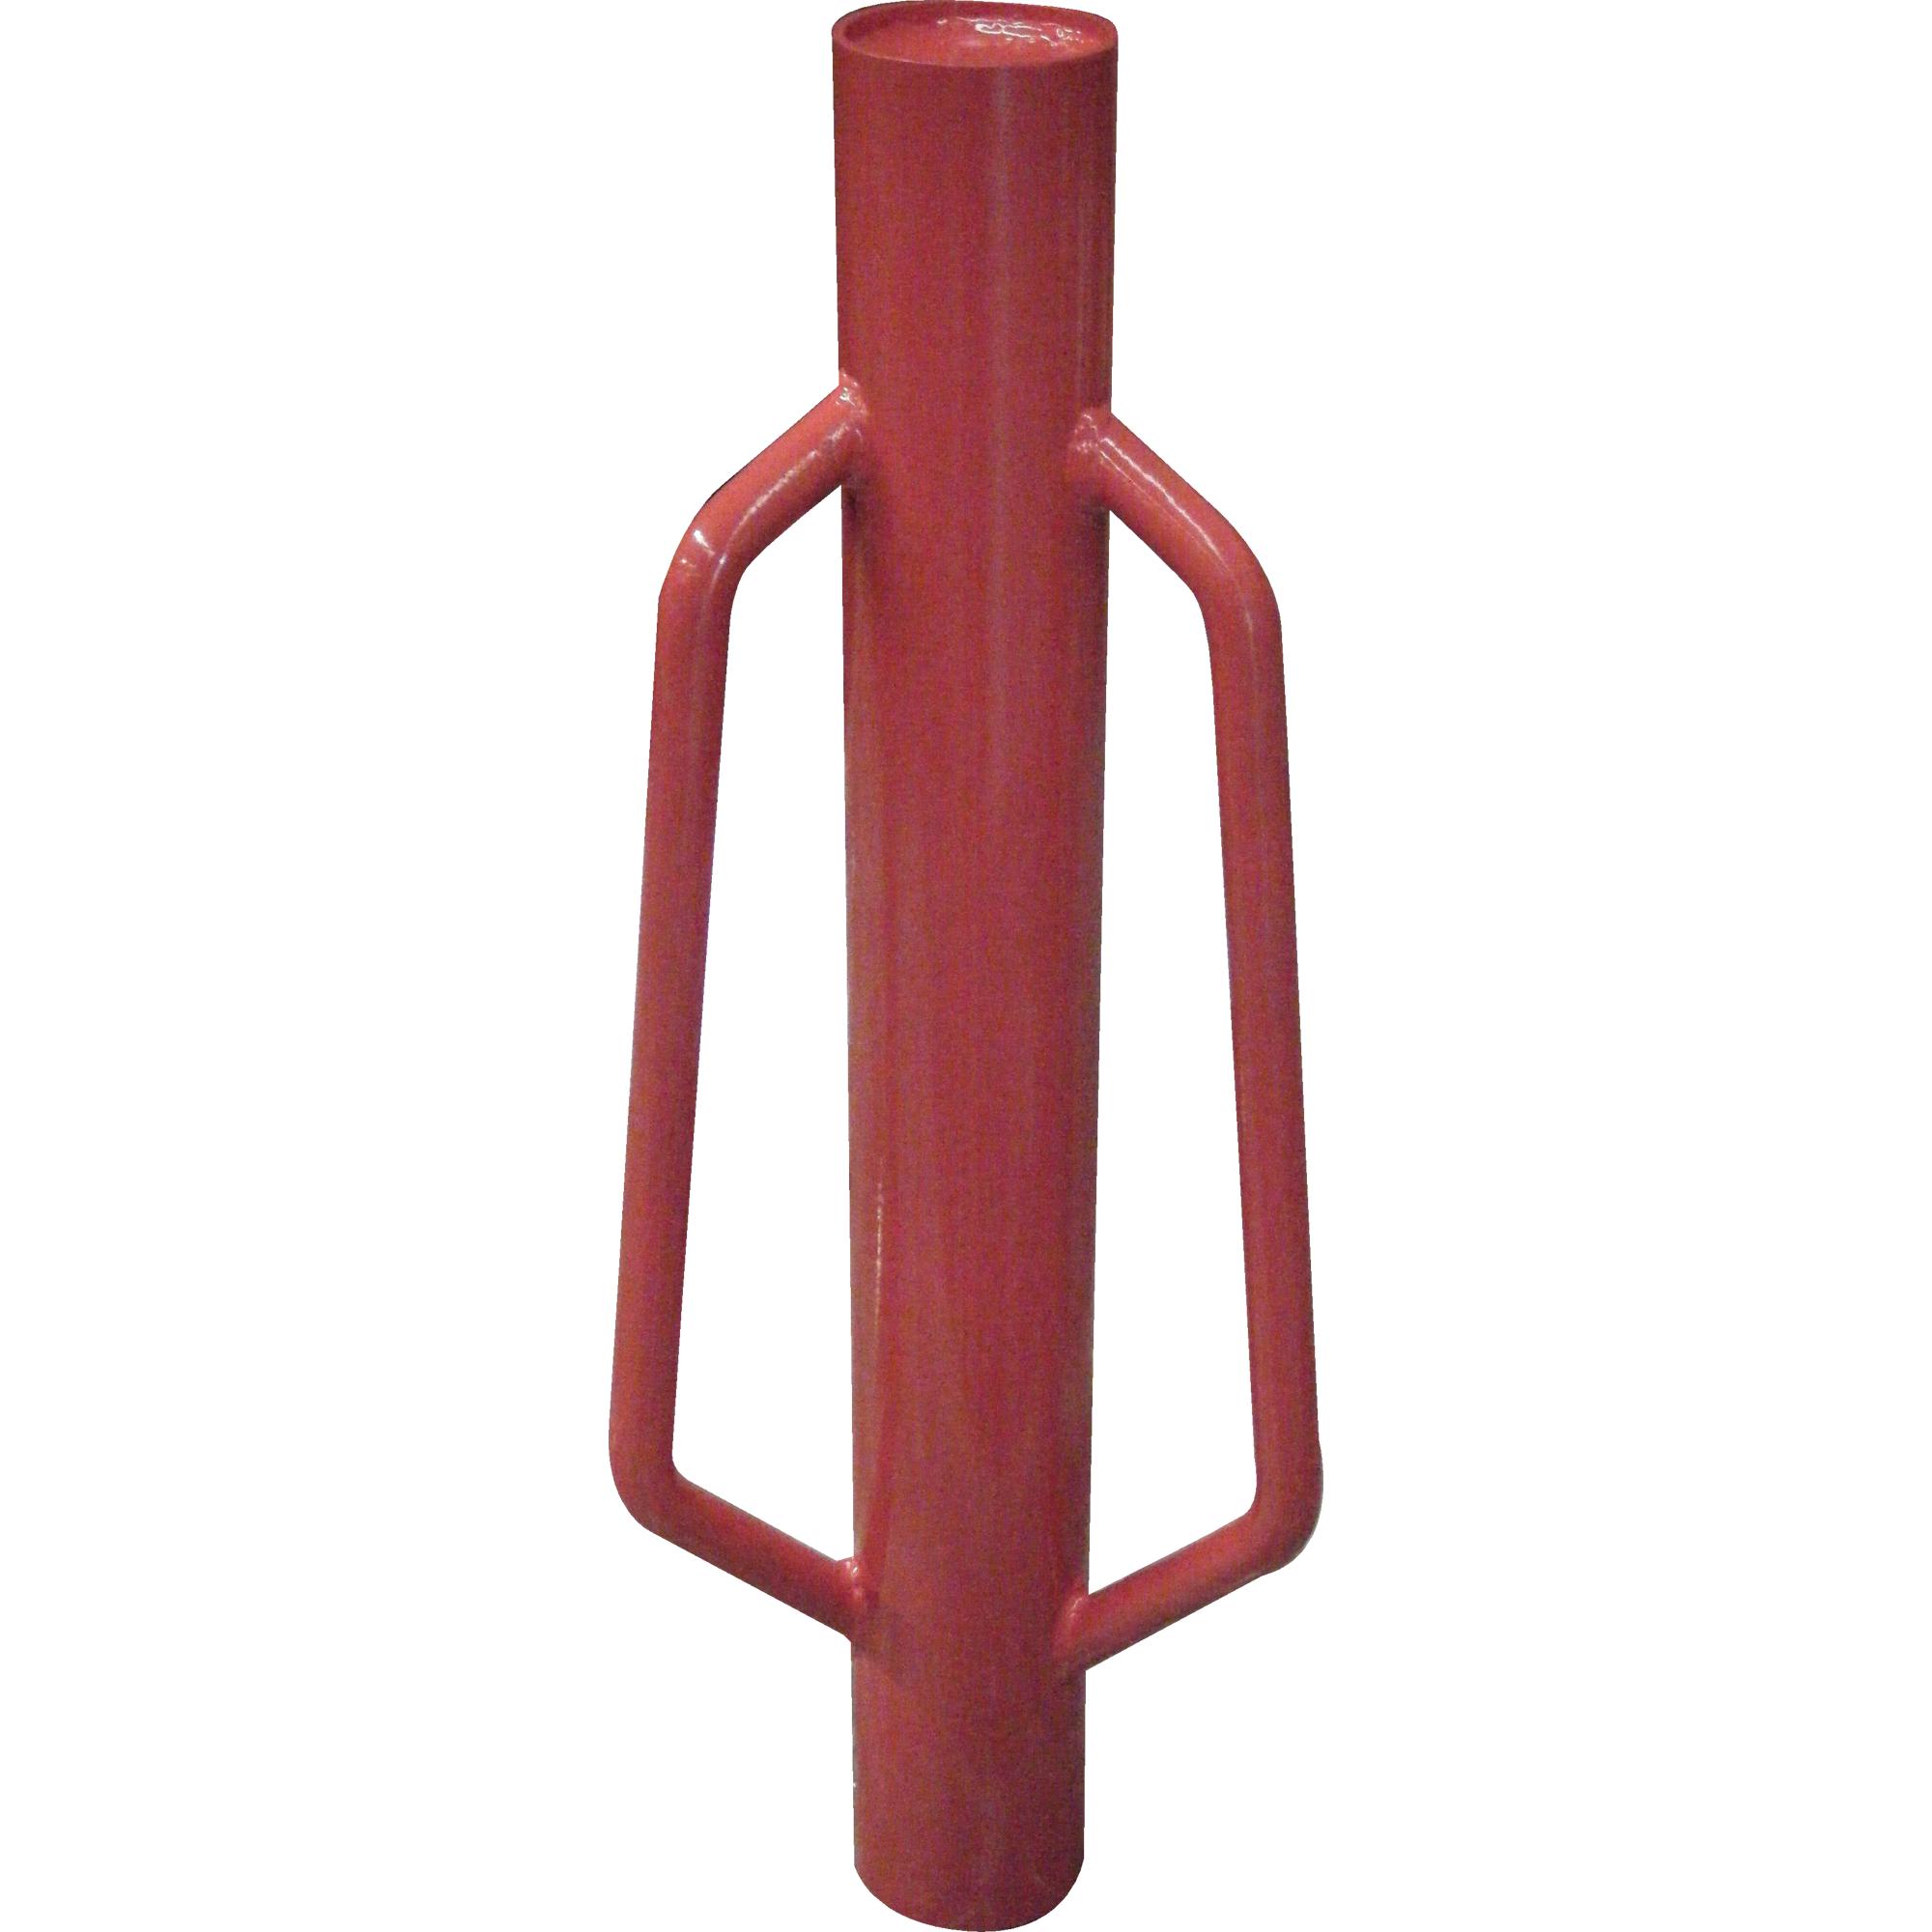
Also known as a “side hammer,” a hollow steel tube with handles encases a heavy steel weight. Fitting over a post, the driver works like a sledgehammer with a larger striking surface – the momentum of the lifting and falling weight drives the post down. These are a great time-saving alternative to the "by-hand" methods explored above. While still physically taxing, they are great for individual posts as well as signs for road-side advertising and real estate.
Pros: A manual method that is relatively inexpensive; control the depth of the post in the ground (i.e. smaller hits would mean less drive into the ground).
Cons: Physically taxing; high risk for injury if used incorrectly; posts widths are limited by the size of the driver; and difficult to use on stony ground which often causes damage to the post.
Method 5. Skid-steer post driver attachment
Skid Steer Post driver attachments are the most efficient method because it requires no prior prep work, such as digging holes. The hydraulics drive a wide range of materials and size posts into any soil condition. You may have noticed we are Skid Steer Solutions, so you're probably not surprised to learn that this is the method we most prefer. It's fast, effective, and you get to operate awesome machinery and attachments. There's nothing better than being faced with a challenging job, and having the exact collection of tools available to turn that challenge into an opportunity. That's what a Post Driver Attachment coupled with your Skid Steer Loader can accomplish.
So you've decided to unleash your machine with a Post Driver, great! There are two different designs you will want to consider. Here are some details on both.
Drop Hammer Style Post Driver
 This Post Driver design features a free fall system that utilizes the force of a falling weight without the aid of springs, a hydraulic cylinder, or return line. It is important to remember that drop hammers are frequently used to break and demolish concrete, which means there's no mercy for fragile wood posts. Not to mention, more moving parts drastically increases the risk for injury.
Pros: A drop hammer is powerful and can drive almost all posts with ease.
Cons: There is no way to control the power of the drop hammer; fractures and damage to the post head is common and inevitable when working with a drop hammer system on tough terrain; expensive when considering it is a single-purpose attachment; requires a skid steer.
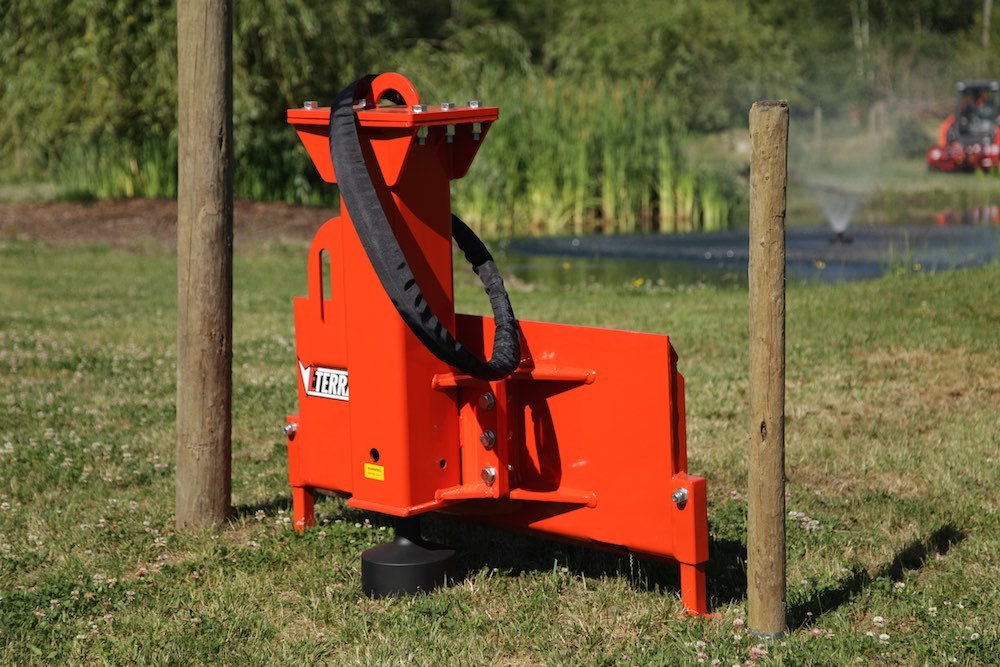
Breaker Style Post Driver Attachment
A Breaker Style Post Driver works much the same way as a drop hammer style post driver except that it has more control over the weight. This design has been originated by Eterra Attachments, and we think it's a game changer and results in arguably the best post driver attachment on the market. Eterra currently produces two models of this innovative design, with two similar but different sets of features, as well as two different classes of impact force: The Eterra BPD-1250, and the Eterra PDX-750. We'll discuss some details below.
Eterra PPD-1250 Breaker Style Post Driver
This popular post driver attachment is 670 lbs of solid high alloy strength steel. Measuring in at a height of 52” and a width of 45”, its 8-inch coned styled driver head cuts down on the number of additional parts, unlike a drop hammer style attachment. In just 10 seconds, it can drive a 6” diameter post 3 ft into the ground — a demonstration of its speed and effectiveness. A breaker style post driver has been tested on posts as small as 4” with the same results: no splitting, cracking, or post head damage. The BPD-1250 is called the “breaker style” because it doubles as a concrete breaker with the purchase of a 5 foot spike. Not only will it shatter rocks, but it can also be used to create pilot holes for your posts.
Eterra PDX-750 Breaker Style Post Driver
A new addition to the growing list of innovative Eterra products, the PDX-750 features many of the same features as the BPD-1250, and even adds a few of its own. The PDX-750 features integrated tilt functionality, meaning there's no need for the purchase of an additional plate. It can also come outfitted with a number of driver head options. There is the standard cone head, as explained above, as well as a flat driver head option, which comes with an integrate housing, as well as a number of different eyelets. The flat driver option, combined with the housing, allows for all different types of fence posts to be pounded, all the way up to 8" in diameter. The housing means the post will remain secure, the eyelets come as follows: 8.5" (8" post), 6.5" (6" post), 4.5" (4" post), 2.5" (2" post or steel T post). Many professionals elect to have the smallest eyelet cut to a custom shape, allowing for T-posts and other odd shapes to be handled and secured extremely fast. Just like the BDP, the PDX can swap in a 5-foot concrete breaker tool at any time, and with a truly modular design, can be customized with various plates and couplers, allowing the main unit to transfer to backhoes and excavators with ease. The PDX-750 builds off the powerful reputation of the BDP-1250 and adds a host of innovation and customization to the table.
Post Driver Attachment Pros: Powerful without being damaging; cost effective as a multipurpose tool; the fastest available option; multiple driving options for all post types; ability to operate on uneven terrain with the aid of tilt functionality
Post Driver Attachment Cons: The upfront cost is more expensive than other options; requires a skid steer.
Editors note: Updated for 2018 with additional information, including the introduction of the PDX-750 Post Driver.